Imagine you’re responsible for security at a company that uses Azure Active Directory. One day, you receive a report of an attempted security breach. You need to act fast to protect your company’s data.
With Accelerynt and Azure Active Directory locations, you can quickly and easily block the attacker’s IP address. This will help to minimize the damage they can do and reduce the amount of time you spend on responding to the incident.
In this article, we’ll show you how to use Azure Active Directory locations to reduce the amount of time you spend on security incidents.
What Is Azure Active Directory?
Azure Active Directory (AAD) is a cloud-based identity and access management service. It provides a single sign-on experience for users that access applications both on-premises and in the cloud.
AAD is a part of Microsoft Azure, which is a suite of cloud services that helps you build, deploy, and manage applications. Azure includes services for computer, networking, storage, data management, messaging, security, AI, and mixed reality.
AAD can be used to manage identities for your users, groups, and devices. You can use AAD to manage access to your applications and resources both on-premises and in the cloud.
What Are the Benefits of Using Azure Active Directory Locations?
When you use Azure Active Directory locations, you get a few key benefits:
#1: You can reduce the time it takes to respond to security incidents.
#2: You can increase the cost of an adversary’s attack by forcing them to rotate IP addresses.
#3: You can reduce the potential for human error by following a playbook.
How to Use Azure Active Directory Locations to Reduce Time Spent on Security Incidents?
In order to use Azure Active Directory Locations to reduce the time spent on security incidents, you will need to create a playbook.
The playbook will be used to push entities from Sentinel into a defined location of your choosing.
You can utilize this playbook in conjunction with Conditional Access to dynamically add IPs to a blocklist, reducing the time to respond to security incidents.
This will result in a reduction in incident response time. It will also increase the cost of the adversary’s attack by forcing them to rotate IP addresses.
Lastly, it reduces the potential for human error by following a playbook that is easily customizable and repeatable.
What Are Some Best Practices for Using Azure Active Directory Locations?
When using Azure Active Directory locations, there are a few best practices to keep in mind:
- Make sure you’re familiar with the different types of locations available.
- Plan your location strategy carefully.
- Test your locations before you roll them out to your users.
- Keep up with the latest changes and updates to Azure Active Directory.
How to add IP addresses from alerts to an Azure Active Directory Location?
This playbook is intended to be run from Microsoft Sentinel.
Based upon desired Alert Rule Criteria, it will grab the IP address from Microsoft Sentinel Alerts and add them to a Microsoft Azure Conditional Access Named Locations list, indicating compromised IP addresses.
Requirements
The following items are required under the template settings during deployment:
- A Microsoft Azure Named Locations List
- An App Registration for using the Microsoft Graph API
- An Azure Key Vault Secret containing your App Registration Secret
Setup
Create a Named Locations list:
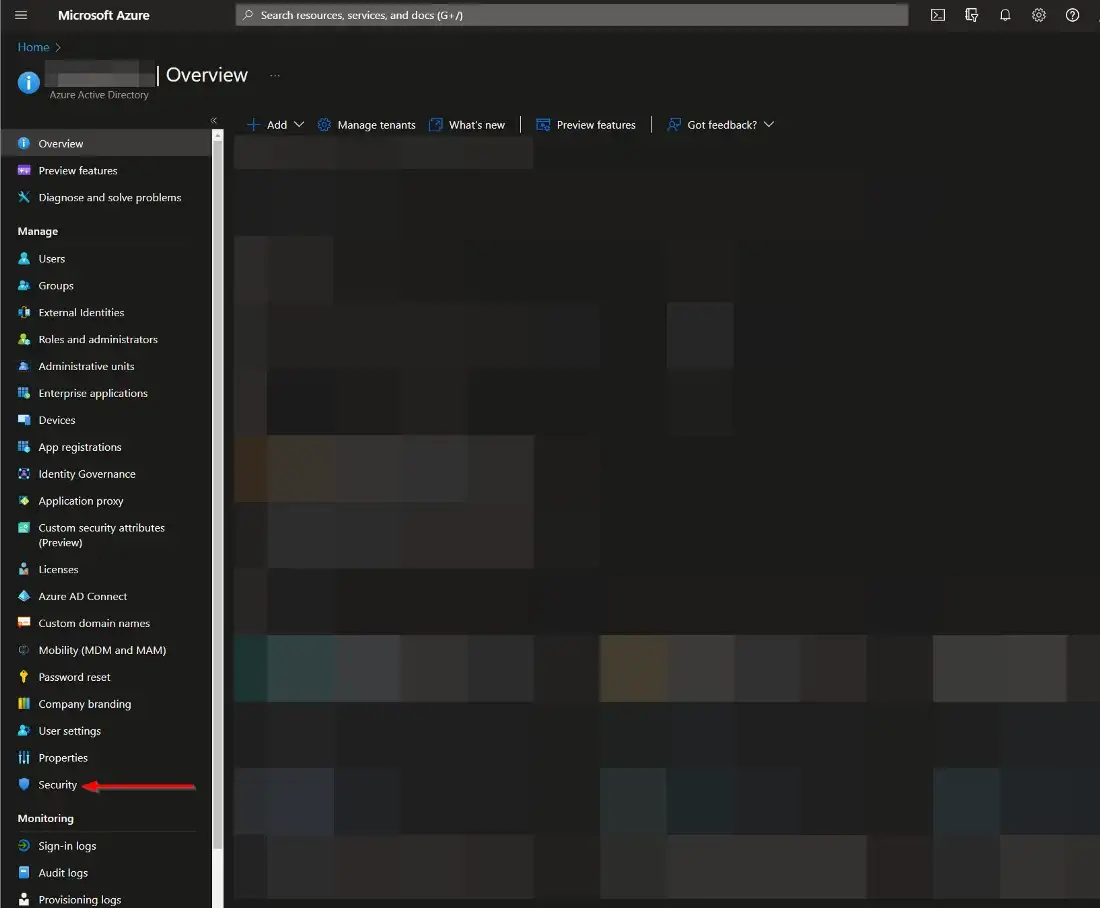
Navigate to the Microsoft Azure Active Directory Menu:
https://portal.azure.com/#view/Microsoft_AAD_IAM/ActiveDirectoryMenuBlade/~/Overview
From there, click the “Security” menu option.
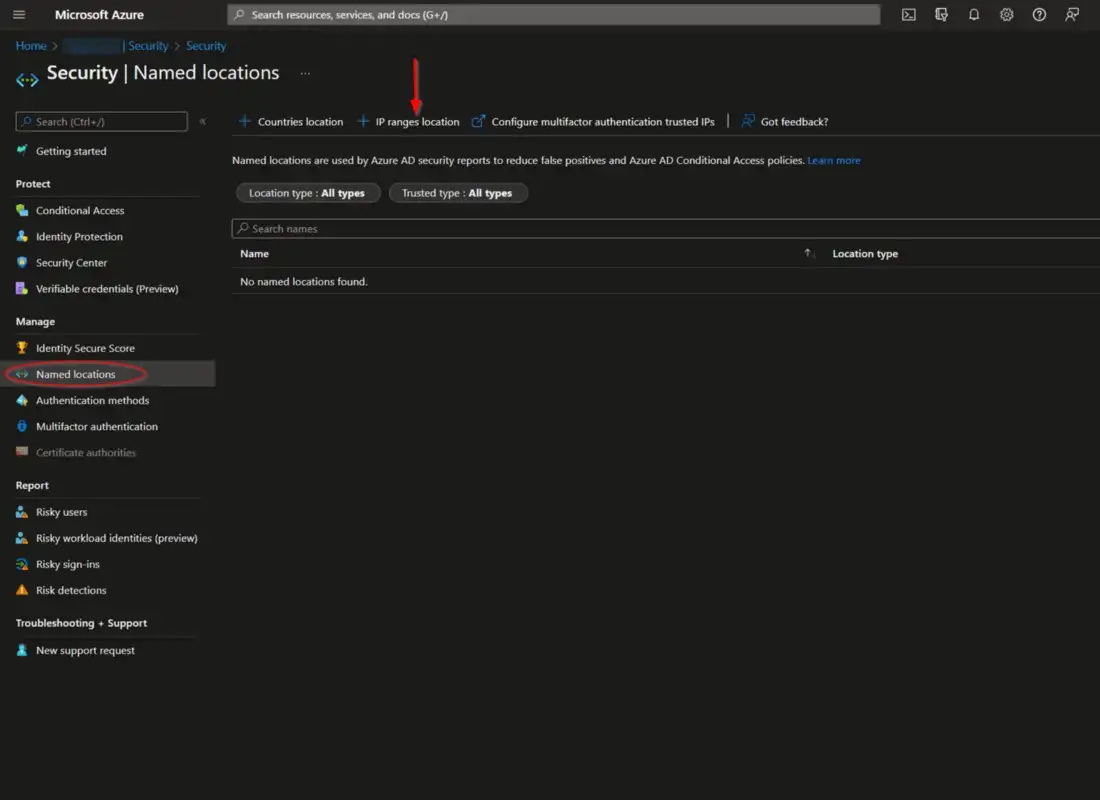
Navigate to the “Named locations” menu option and then click “IP ranges location”.
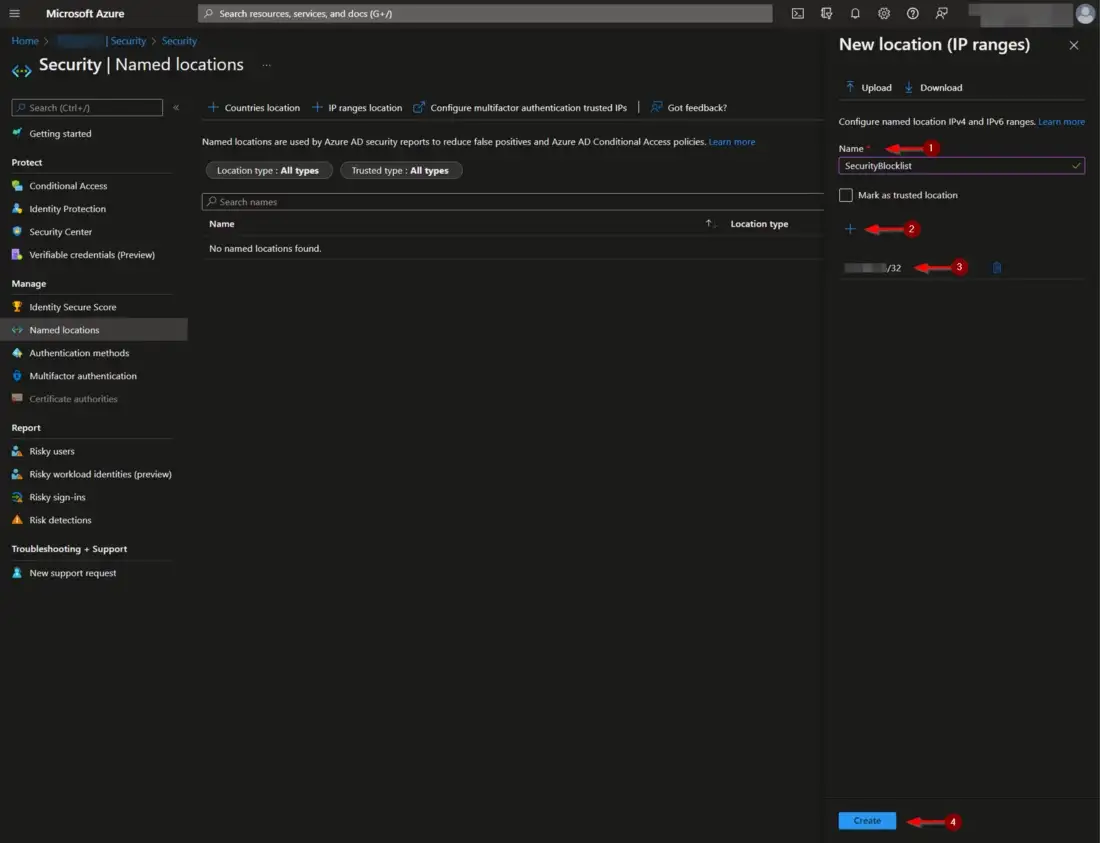
Create a name for your Named Locations list.
The list cannot be saved without an initiating value. It should be noted IPs are only accepted in a CIDR range notation.
Individual IPs processed by this playbook will have a “/32” appended to them to fit this format.
The name of your Named Locations list, along with its ID, should be noted, as these will be required for the deployment of this playbook.
The list ID may be more difficult to track down, as it is currently not displayed in the URL upon selection.
Our solution for this was to send a GET request from https://developer.microsoft.com/en-us/graph/graph-explorer to the following endpoint: https://graph.microsoft.com/v1.0/identity/conditionalAccess/namedLocations.
The JSON response body includes all Named Location lists, along with their IDs.
Create an App Registration:
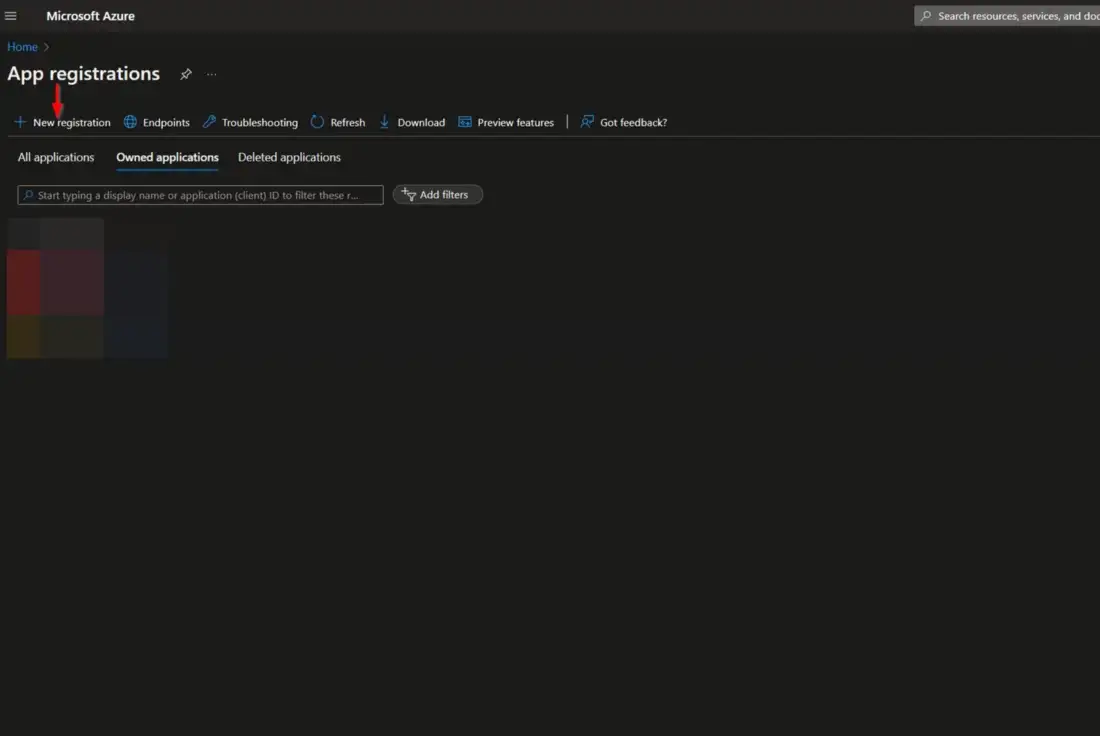
Navigate to the Microsoft Azure Active Directory App Registrations page:
https://portal.azure.com/#view/Microsoft_AAD_RegisteredApps/ApplicationsListBlade
From there, click “New registration”.
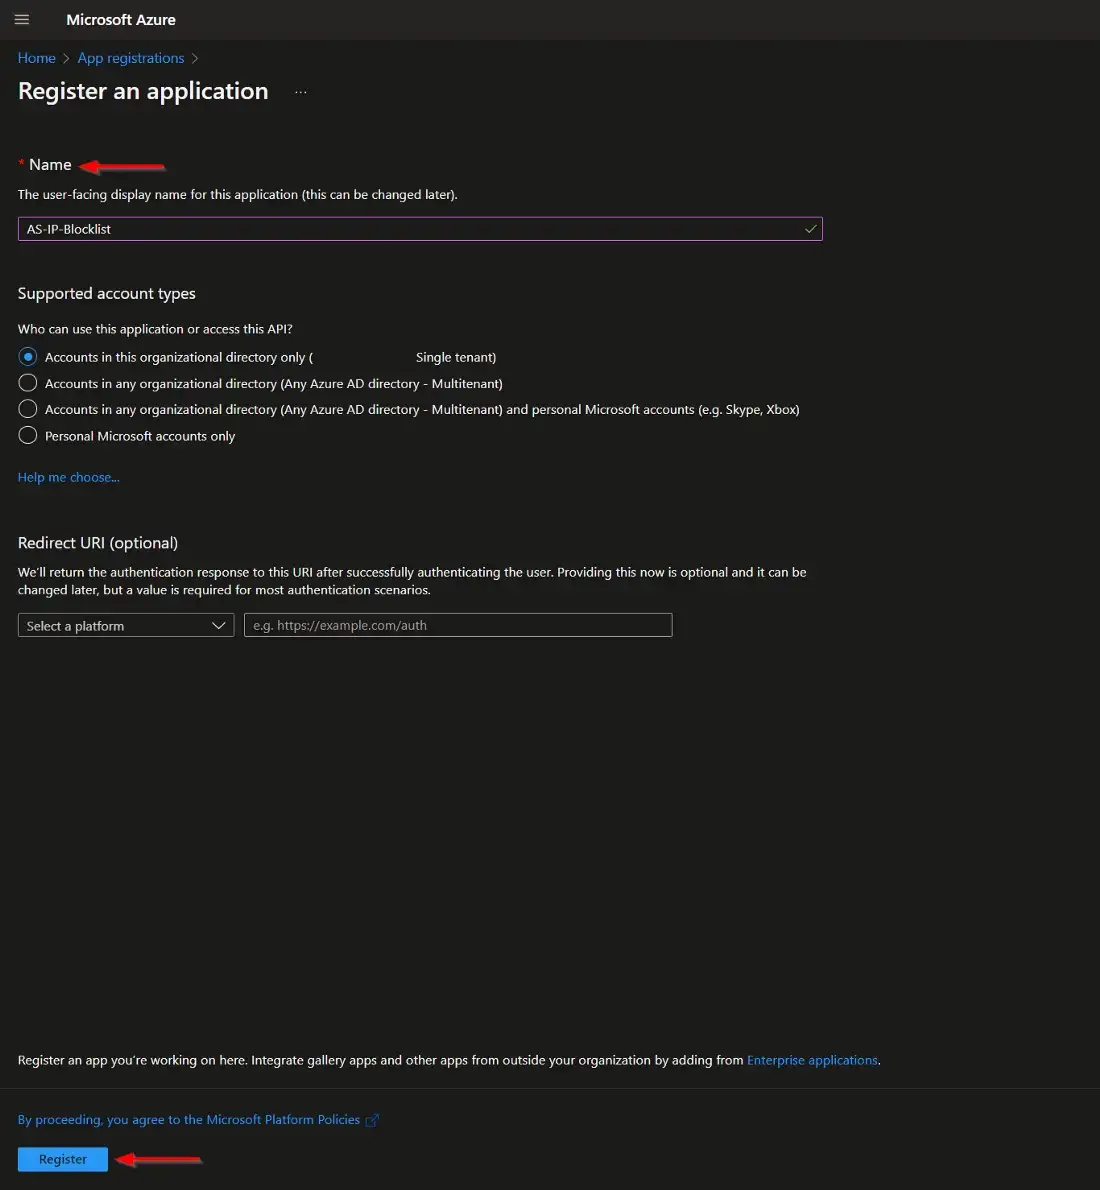
Select a name for your App Registration, such as “AS-IP-Blocklist”, then click “Register”.
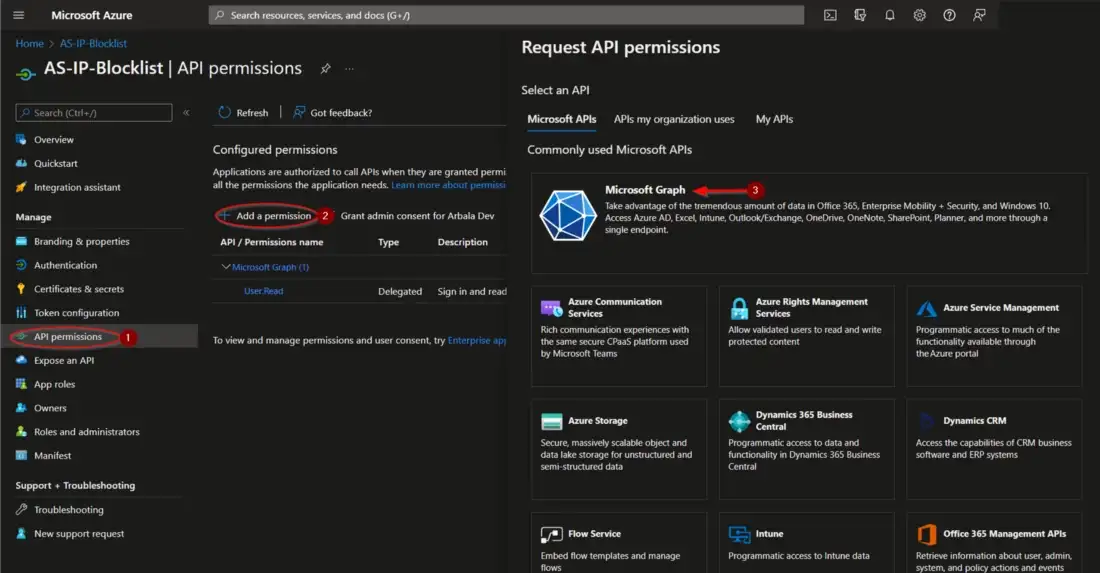
From the application menu blade, select “API permissions” and then click “Add a permission”.
Click the “Microsoft Graph” category.
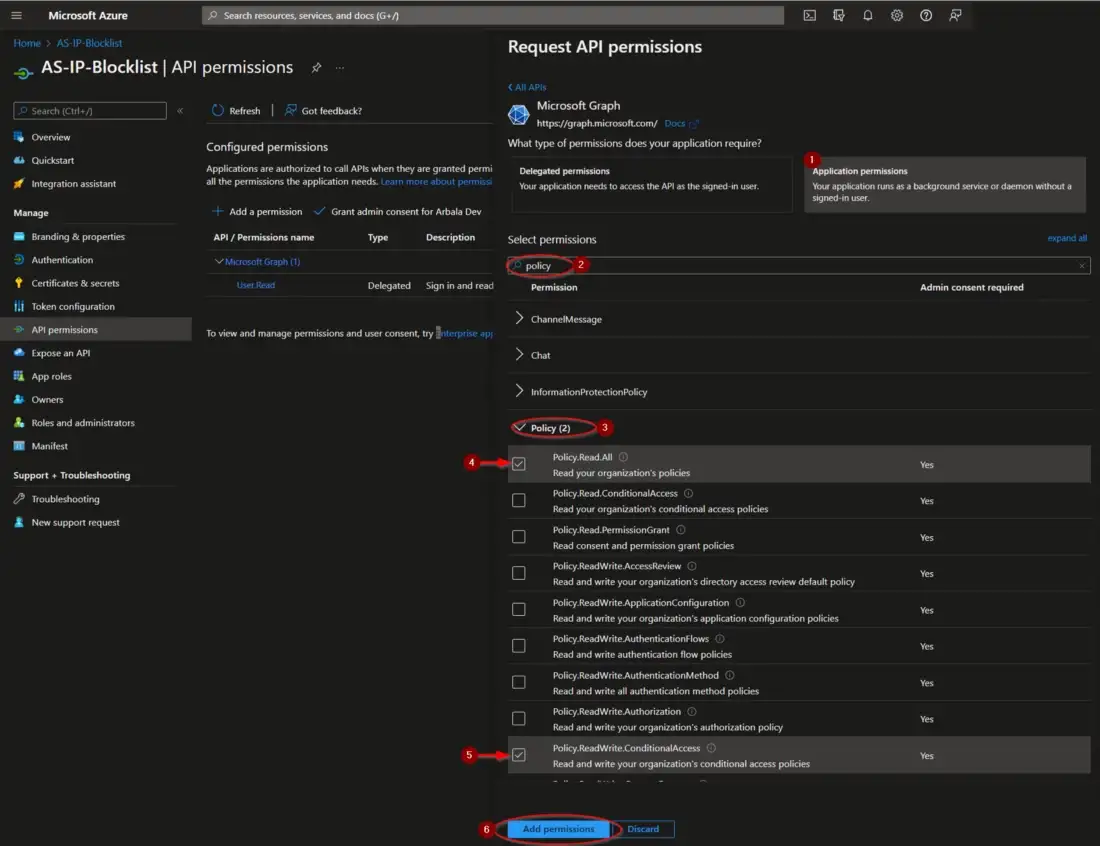
Under “Application permissions”, search for “Policy”, then select the “Policy.Read.All” and ”Policy.ReadWrite.ConditionalAccess” checkboxes.
Click “Add permissions”.
In order for these permissions to be applied, admin consent must also be granted.
Click the indicated “Grant admin consent” button on the “API permissions” page.

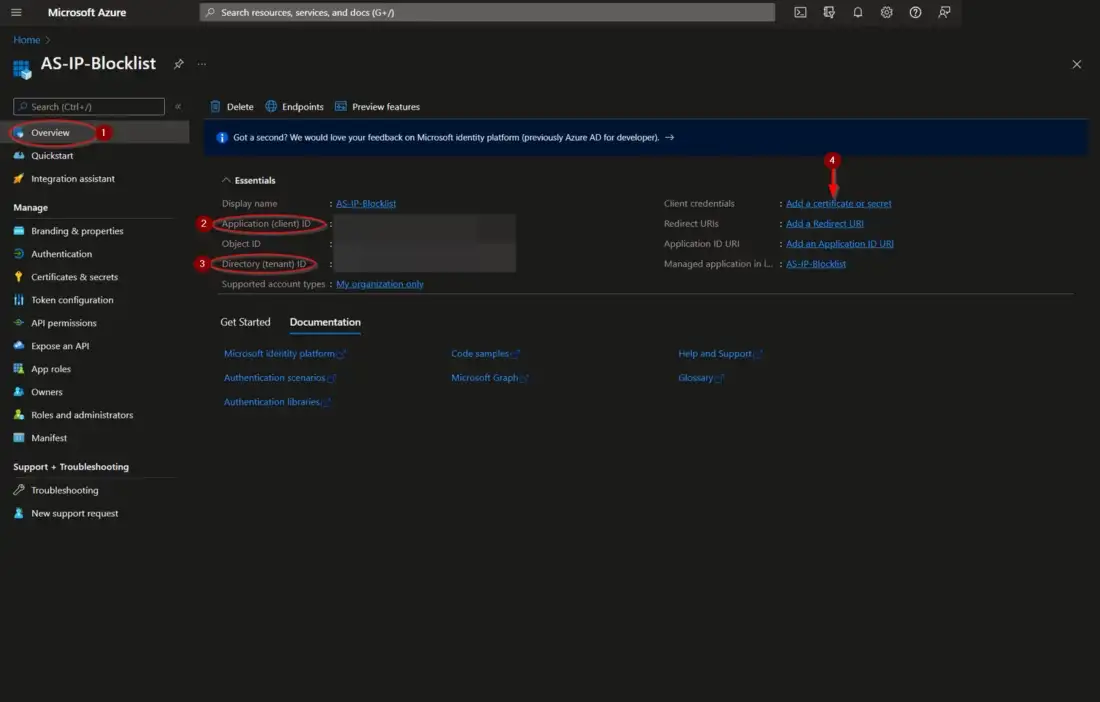
Navigate back to the “Overview” section on the menu and take note of the “Application (client) ID” and “Directory (tenant) ID“, as each will be needed for the deployment of this playbook.
Click “Add a certificate or secret”.
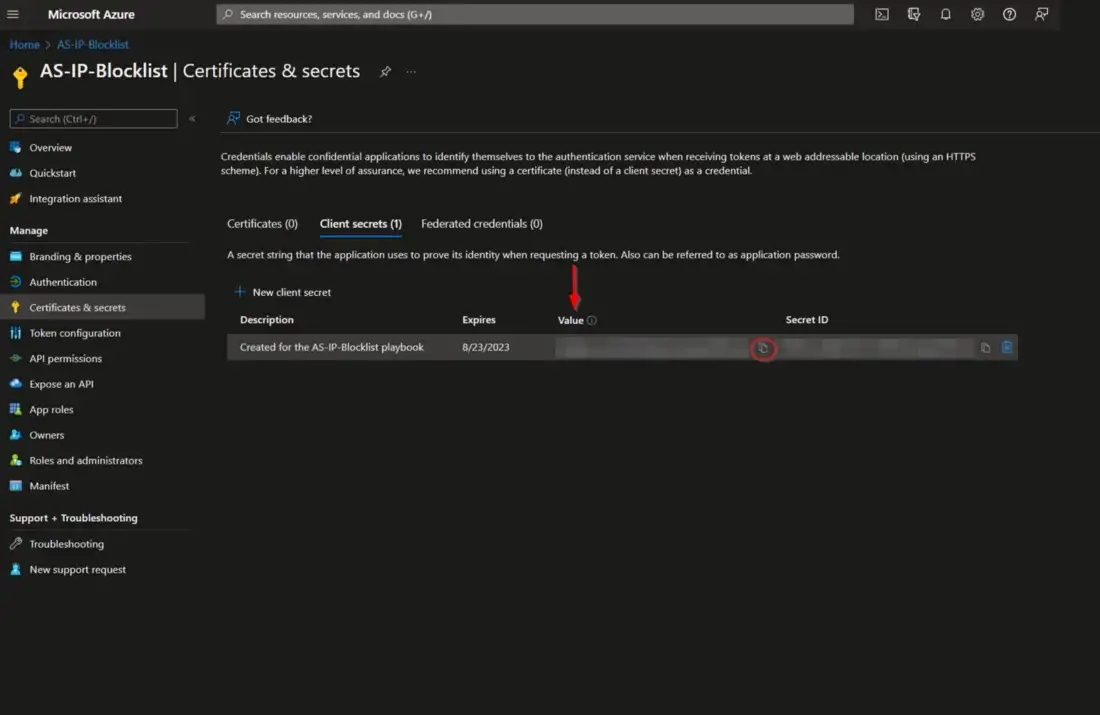
Click “New client secret”. After adding a description and selecting an expiration date, click “Add”.

Copy the generated “Value” and save it for the next step, Create an Azure Key Vault Secret.
Create an Azure Key Vault Secret:
Navigate to the Azure Key Vaults page: https://portal.azure.com/#view/HubsExtension/BrowseResource/resourceType/Microsoft.KeyVault%2Fvaults
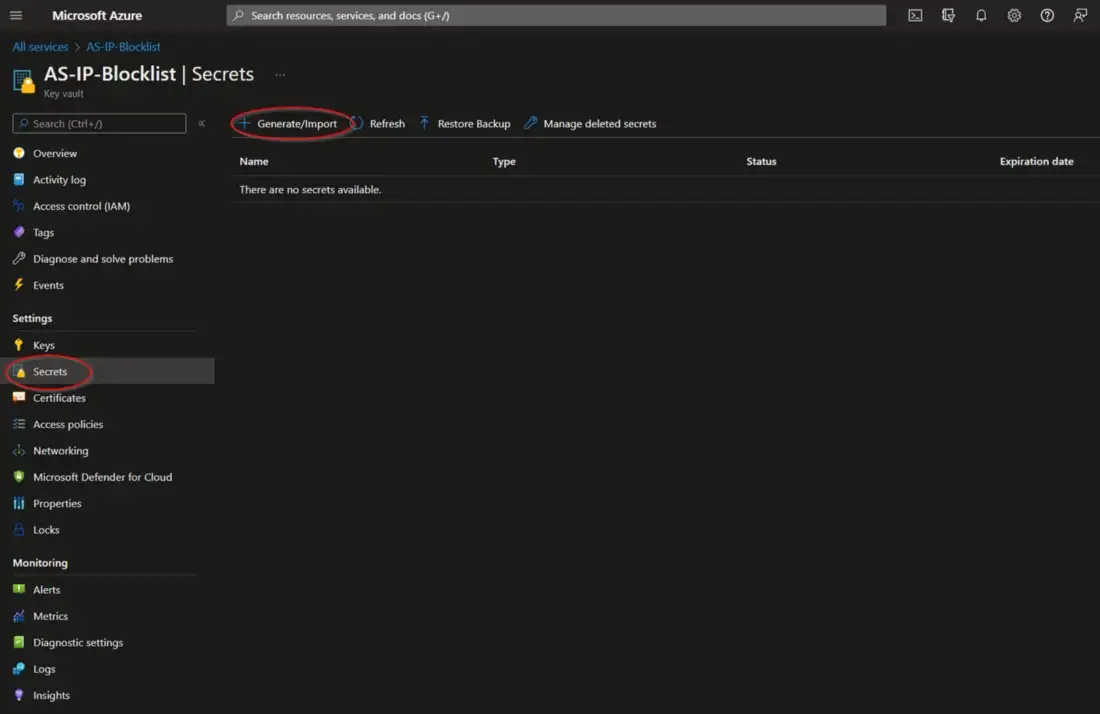
Navigate to an existing Key Vault or create a new one. From the Key Vault overview page, click the “Secrets” menu option, found under the “Settings” section.
Click “Generate/Import”.
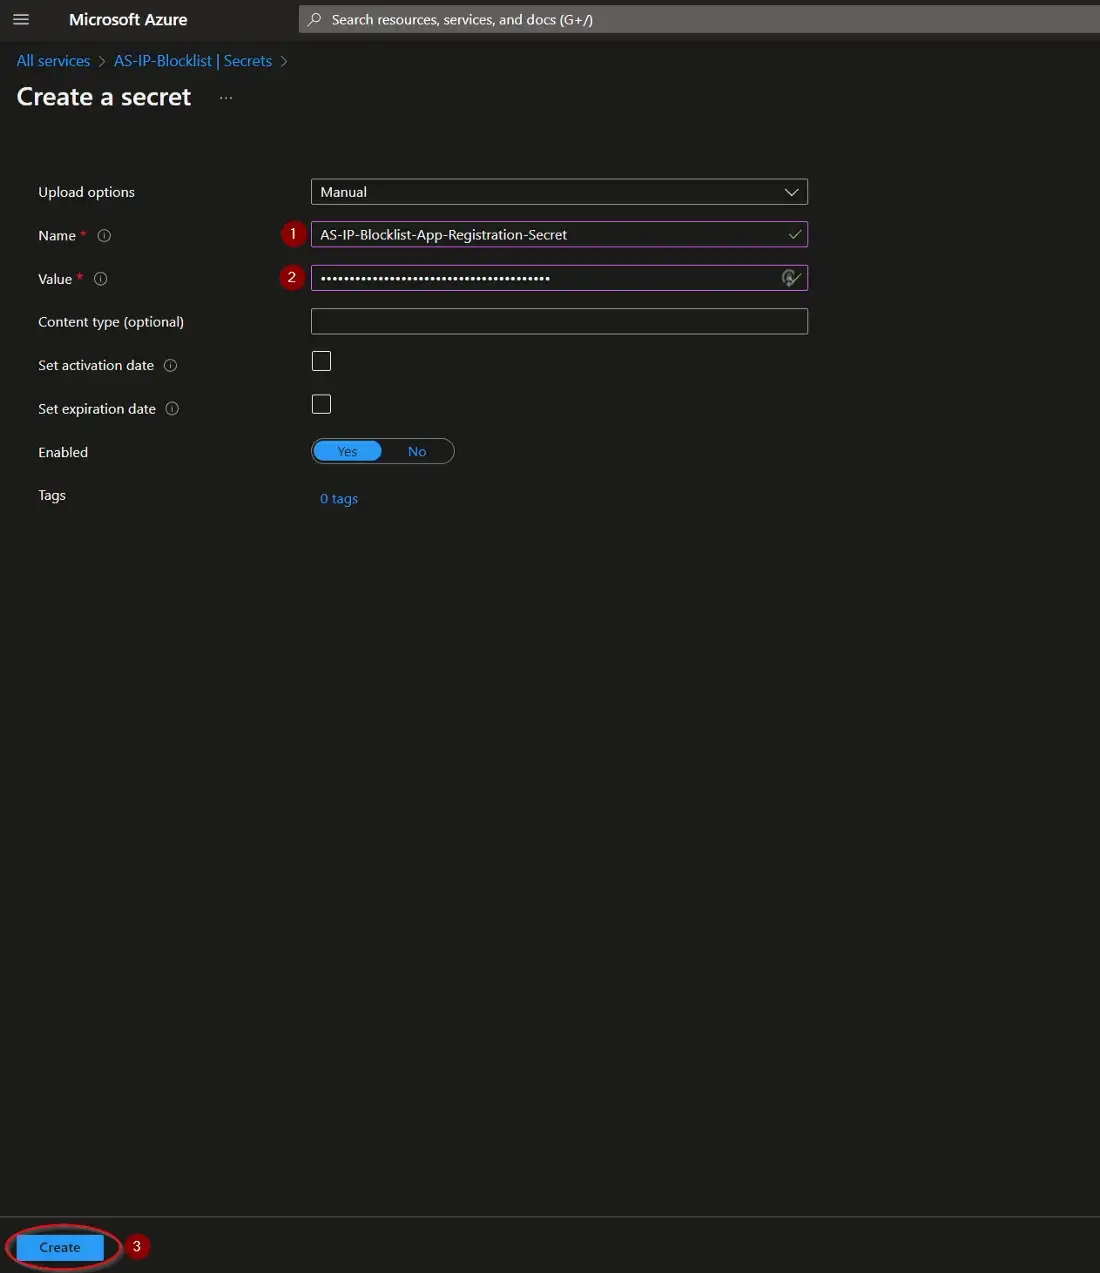
Choose a name for the secret, such as “AS-IP-Blocklist-App-Registration-Secret”, and enter the App Registration Secret copied previously in the “Value” field. All other settings can be left as is.
Click “Create”.
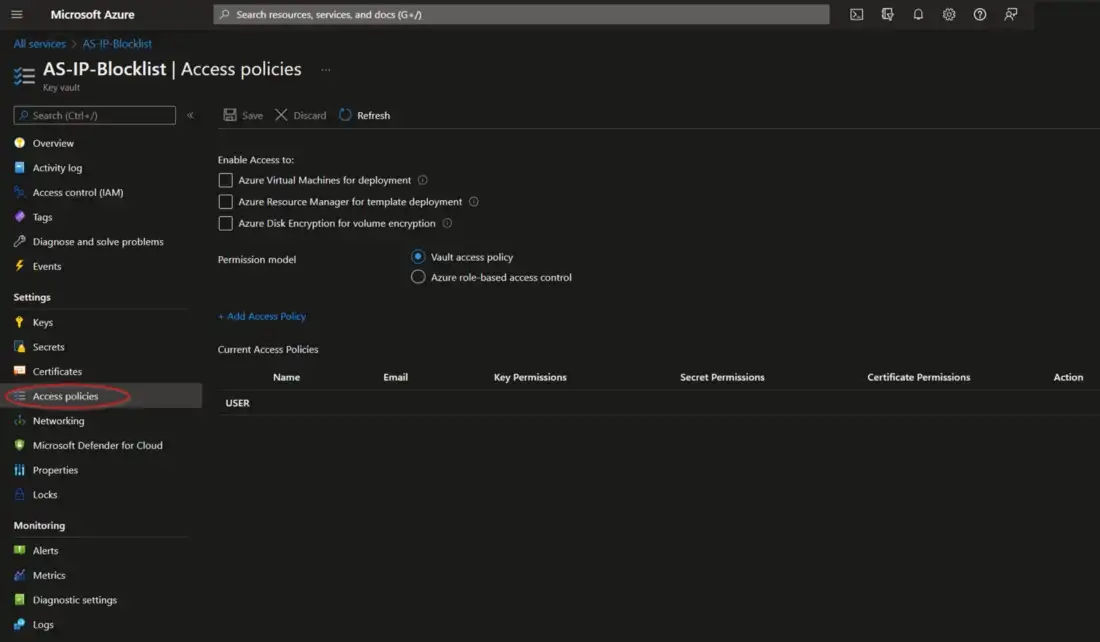
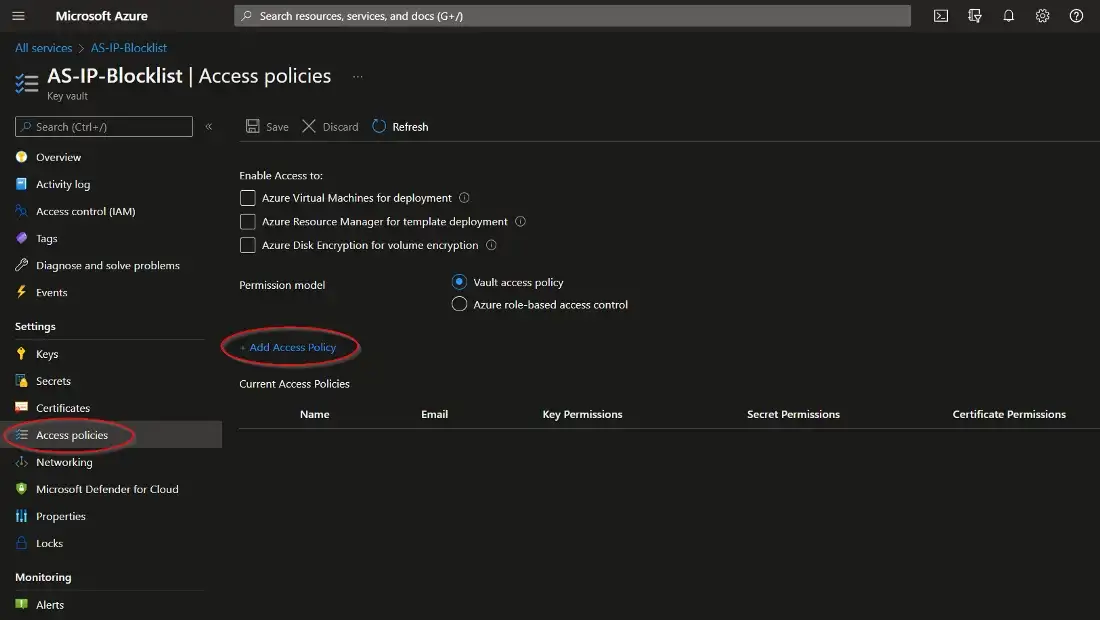
Once your secret has been added to the vault, navigate to the “Access policies” menu option, also found under the “Settings” section on the Key Vault page menu.
Leave this page open, as you will need to return to it once the playbook has been deployed.
See Granting Access to Azure Key Vault.
Deployment
To configure and deploy this playbook:
Open your browser and ensure you are logged into your Microsoft Sentinel workspace. In a separate tab, open the link to our playbook on the Accelerynt Security GitHub Repository:
https://github.com/Accelerynt-Security/AS-IP-Blocklist
Click the “Deploy to Azure” button at the bottom and it will bring you to the custom deployment template.
In the Project Details section:
- Select the “Subscription” and “Resource Group” from the dropdown boxes you would like the playbook deployed.
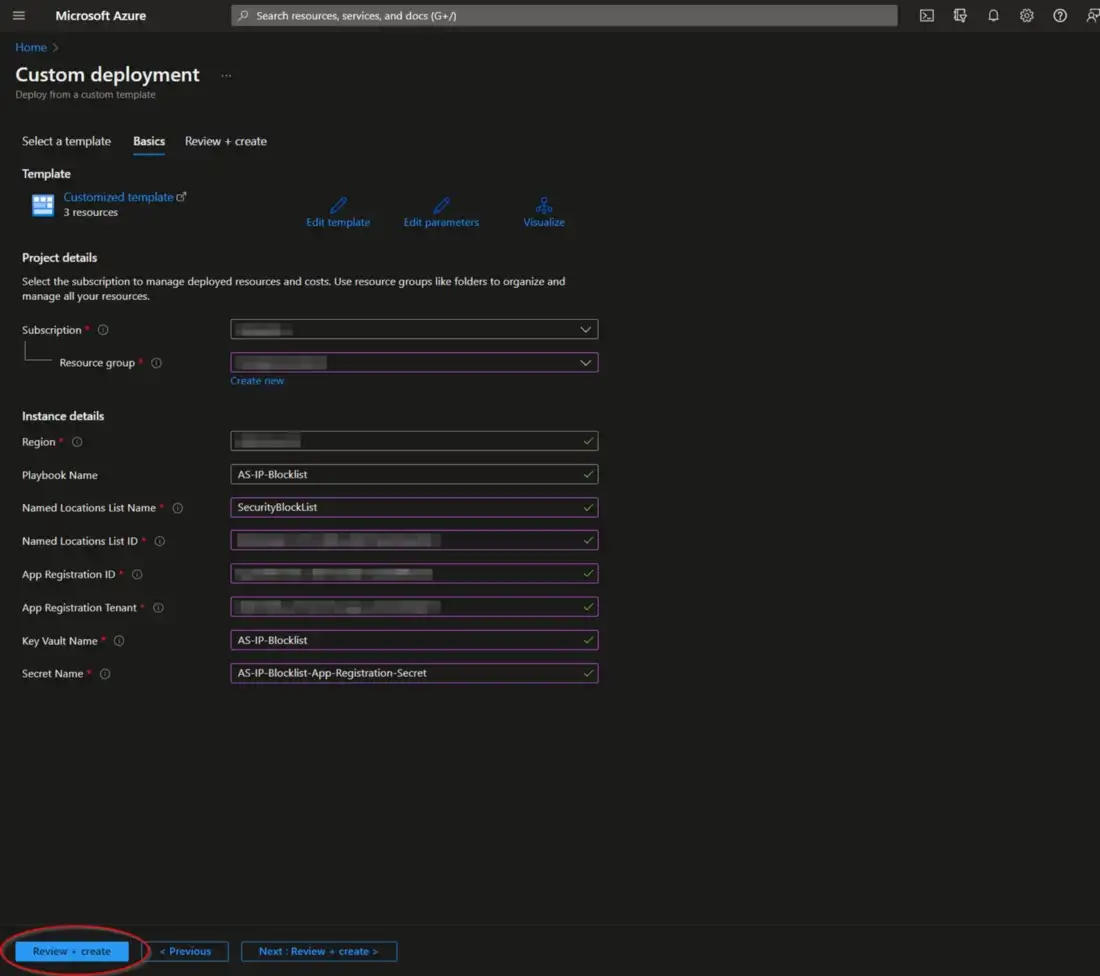
In the Instance Details section:
- Playbook Name: This can be left as “AS-IP-Blocklist” or you may change it.
- Named Locations List Name: Enter the value of the Named Locations list created in Create a Named Locations list.
- Named Locations List ID: Enter the value of the Named Locations list ID referenced in Create a Named Locations list.
- App Registration ID: Enter the value of the Application (client) ID referenced in Create an App Registration.
- App Registration Tenant: Enter the value of the Directory (tenant) ID referenced in Create an App Registration.
- Key Vault Name: Enter the name of the Key Vault referenced in Create an Azure Key Vault Secret.
- Secret Name: Enter the name of the Key Vault Secret created in Create an Azure Key Vault Secret.
Towards the bottom, click on “Review + create”.
Once the resources have validated, click on “Create”.
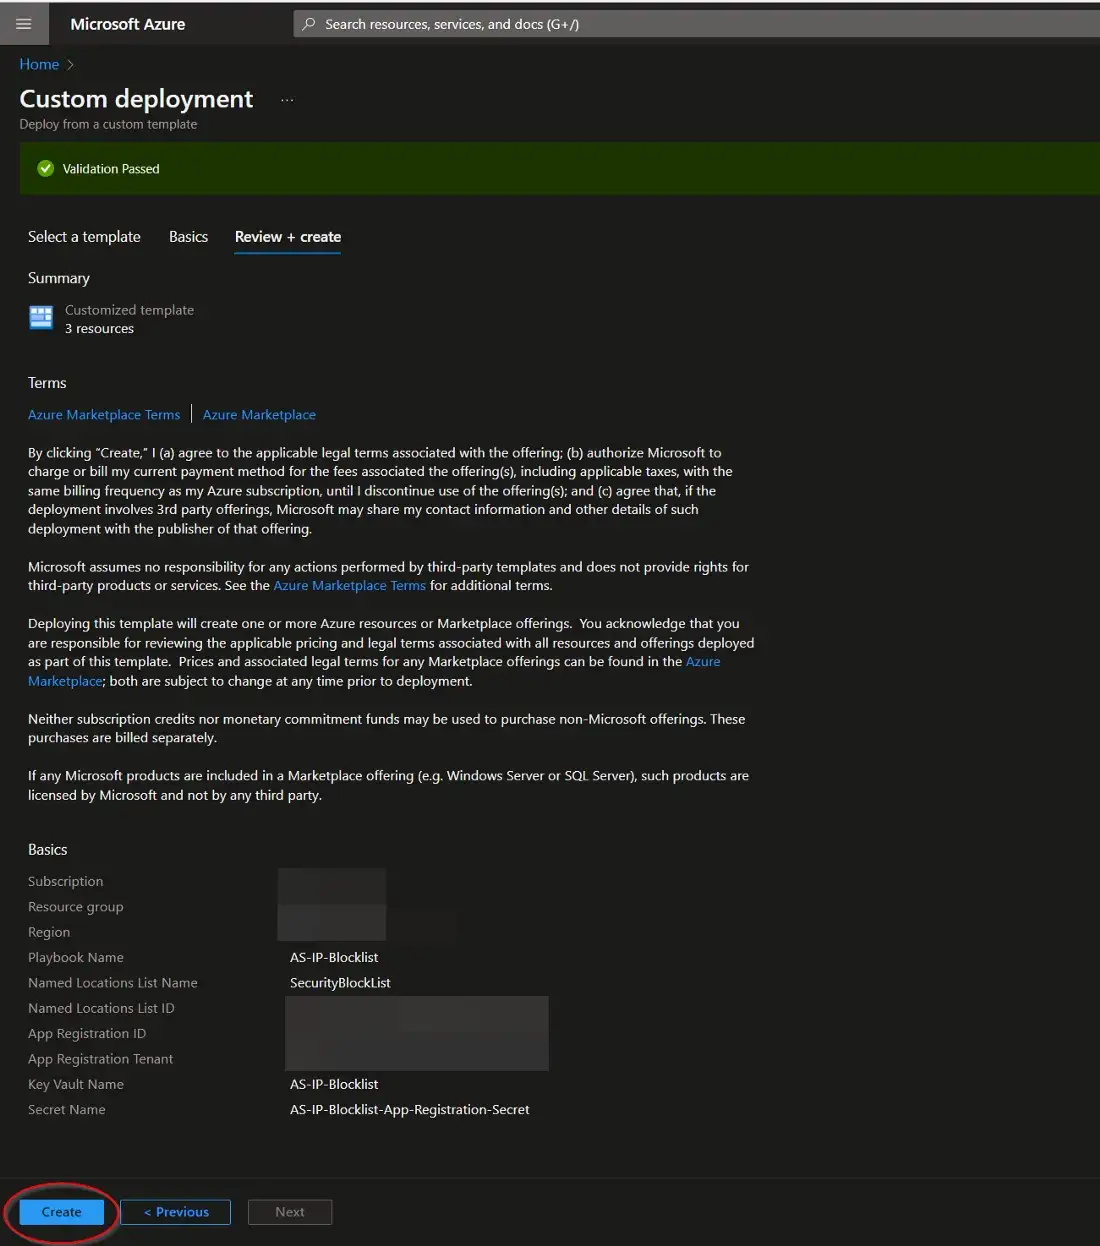
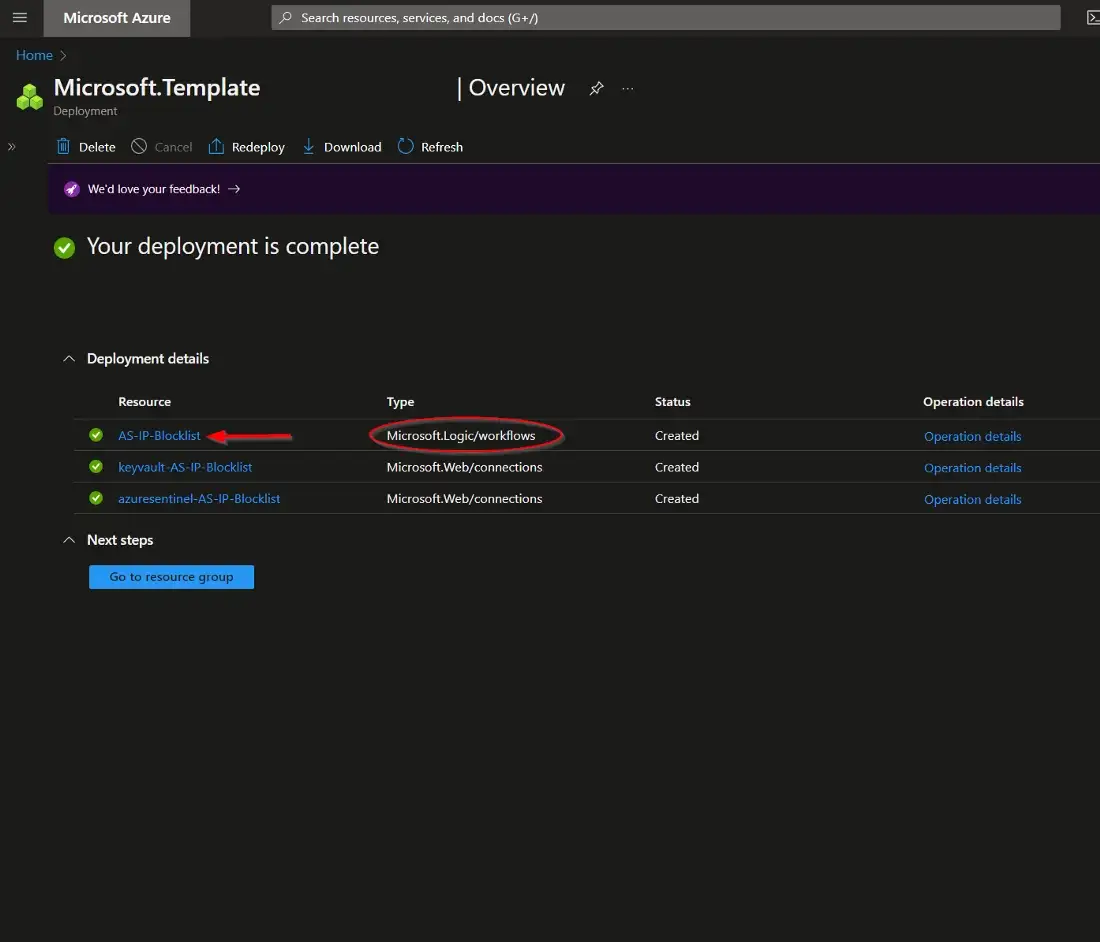
The resources should take around a minute to deploy.
Once the deployment is complete, you can expand the “Deployment details” section to view them.
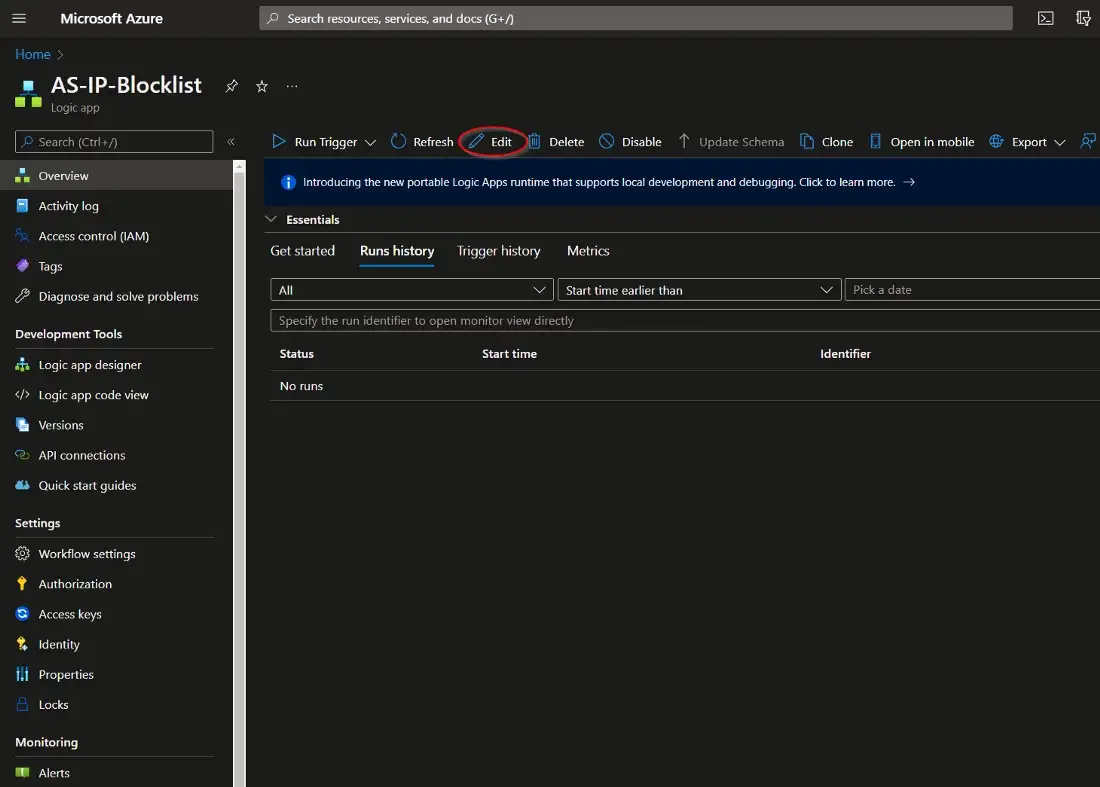
Click the one corresponding to the Logic App.
Click on the “Edit” button.
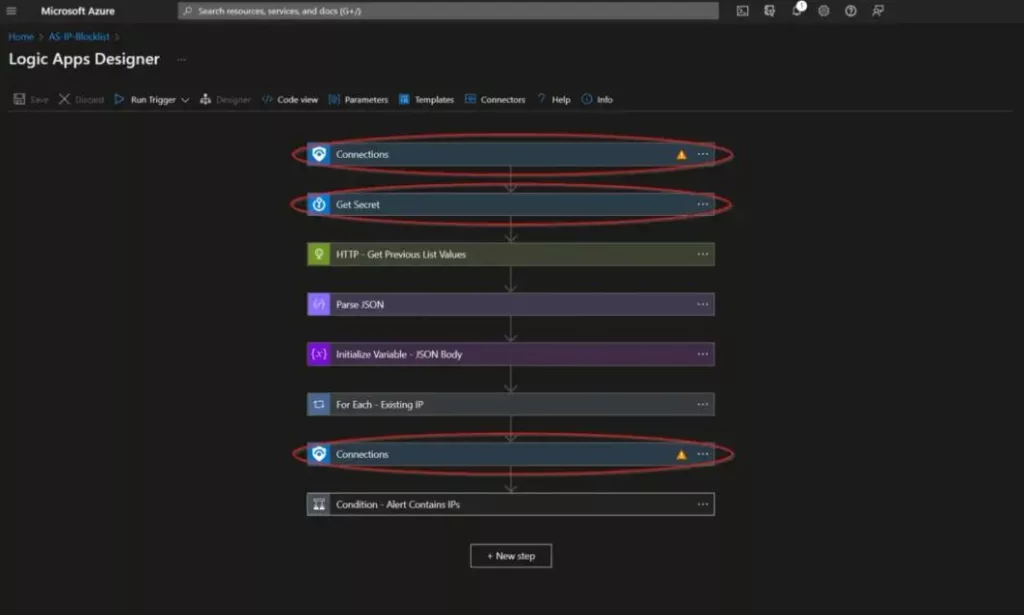
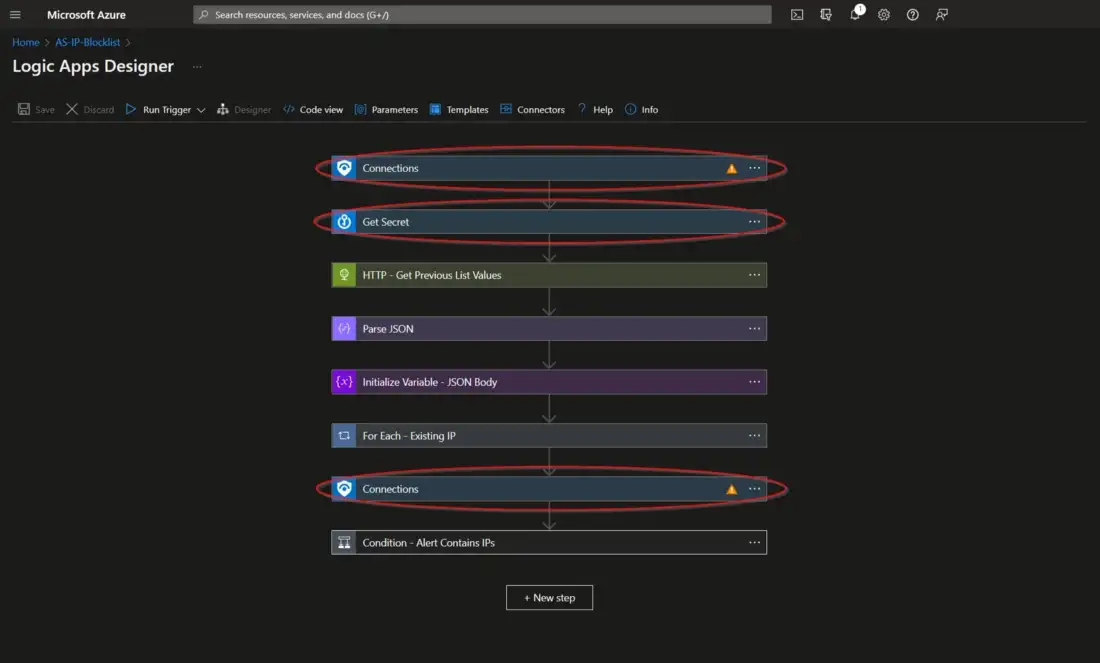
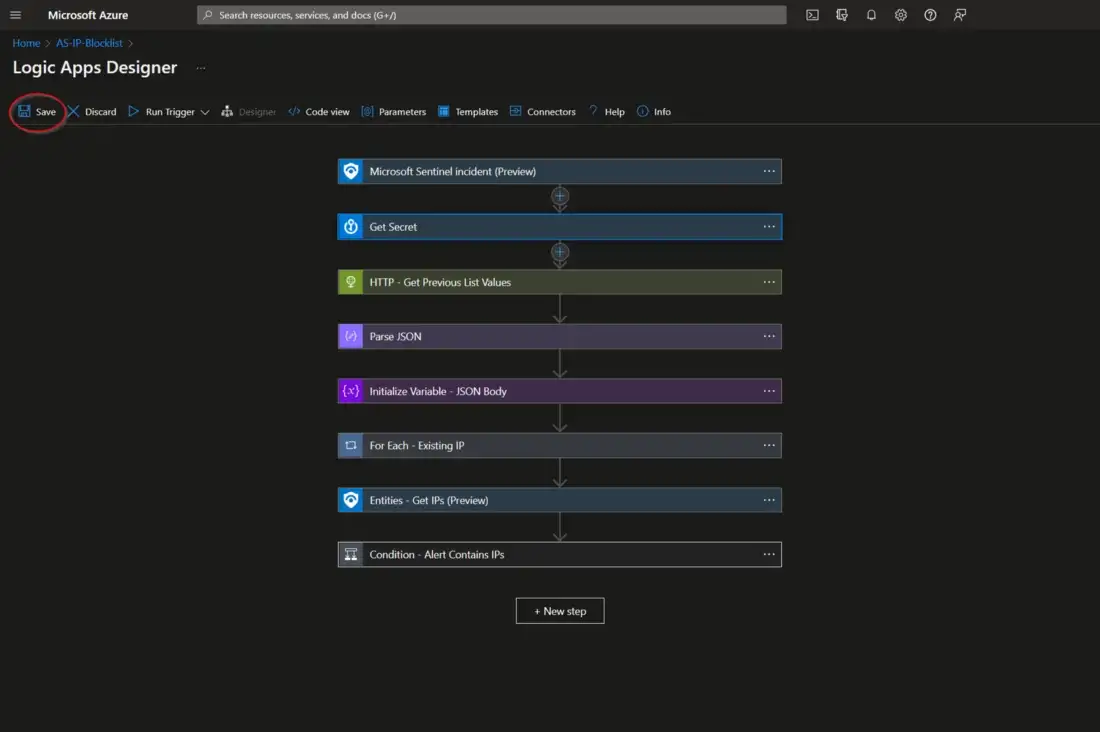
This will bring us into the Logic Apps Designer.
The first and sixth steps labeled “Connections” use connections created during the deployment of this playbook.
Before the playbook can be run, these connections will either need to be authorized in the indicated steps, or existing authorized connections may be alternatively selected.
To validate the connections created for this playbook, expand the “Connections” step and click the exclamation point icon next to the name matching the playbook.
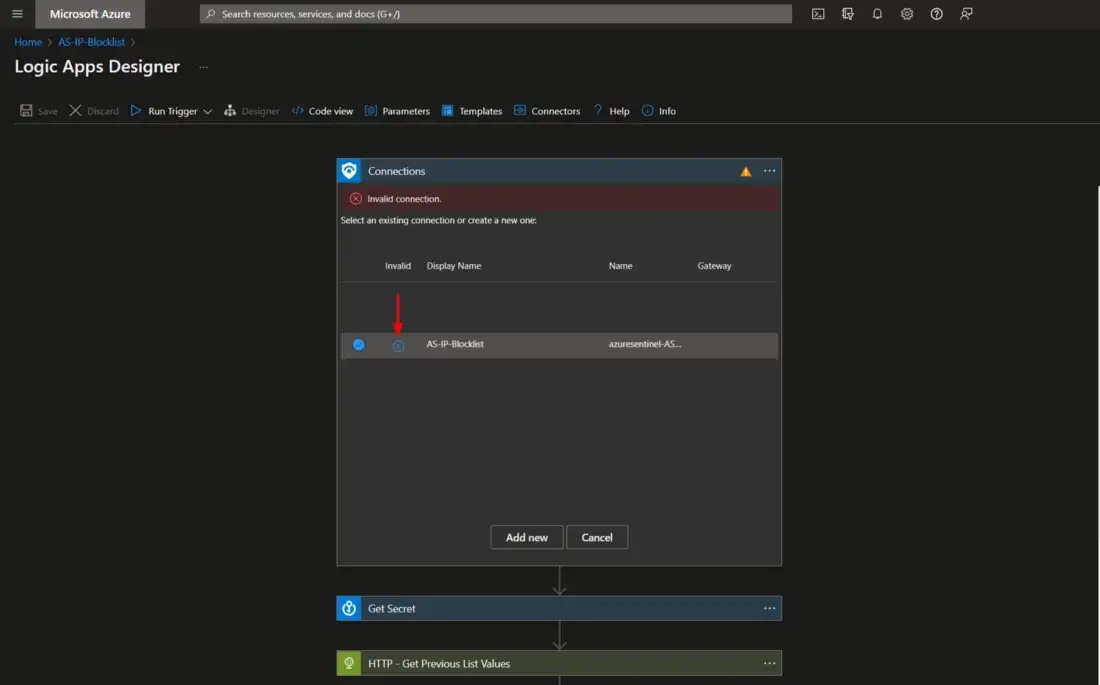
When prompted, sign in to validate the connection.
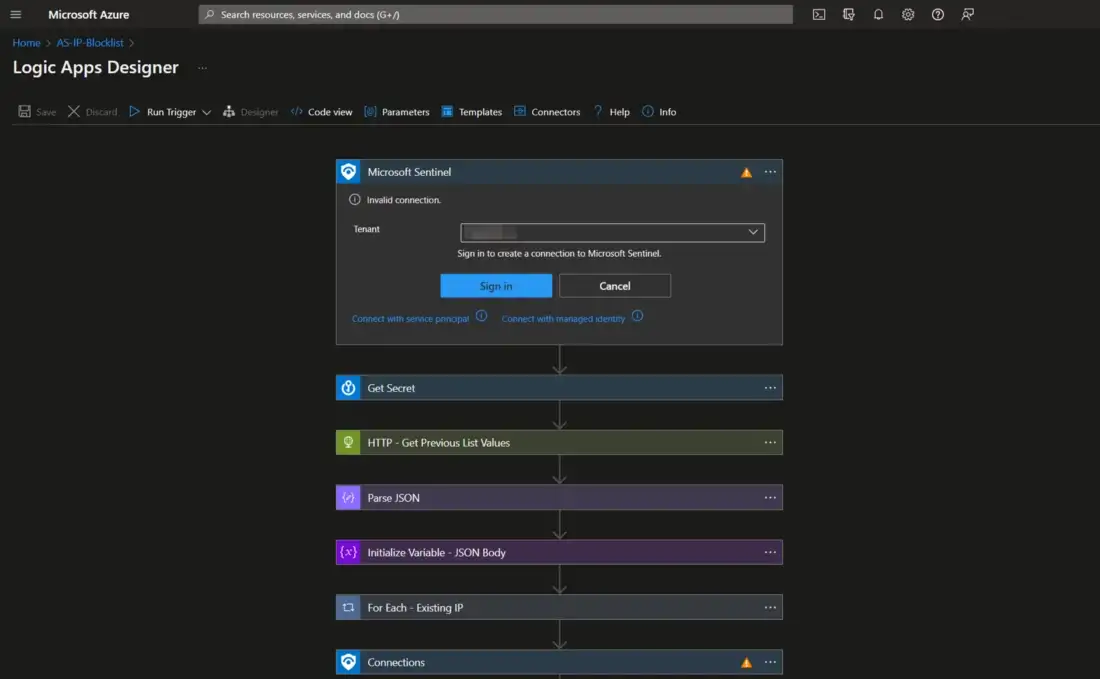
Once both connection steps have been updated, click the “Save” button.
Granting Access to Azure Key Vault
Before the Logic App can run successfully, the key vault connection created during deployment must be granted access to the Key Vault storing your App Registration Secret.
From the Key Vault “Access policies” page, click “Add Access Policy”.
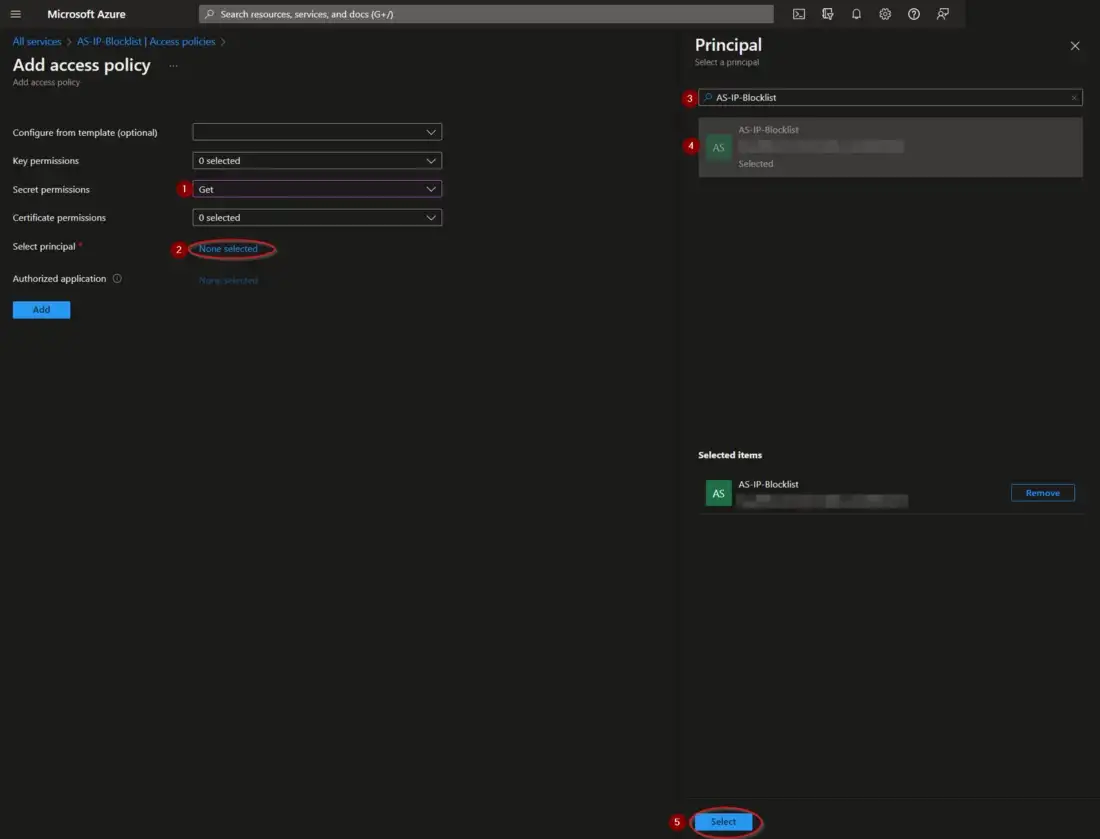
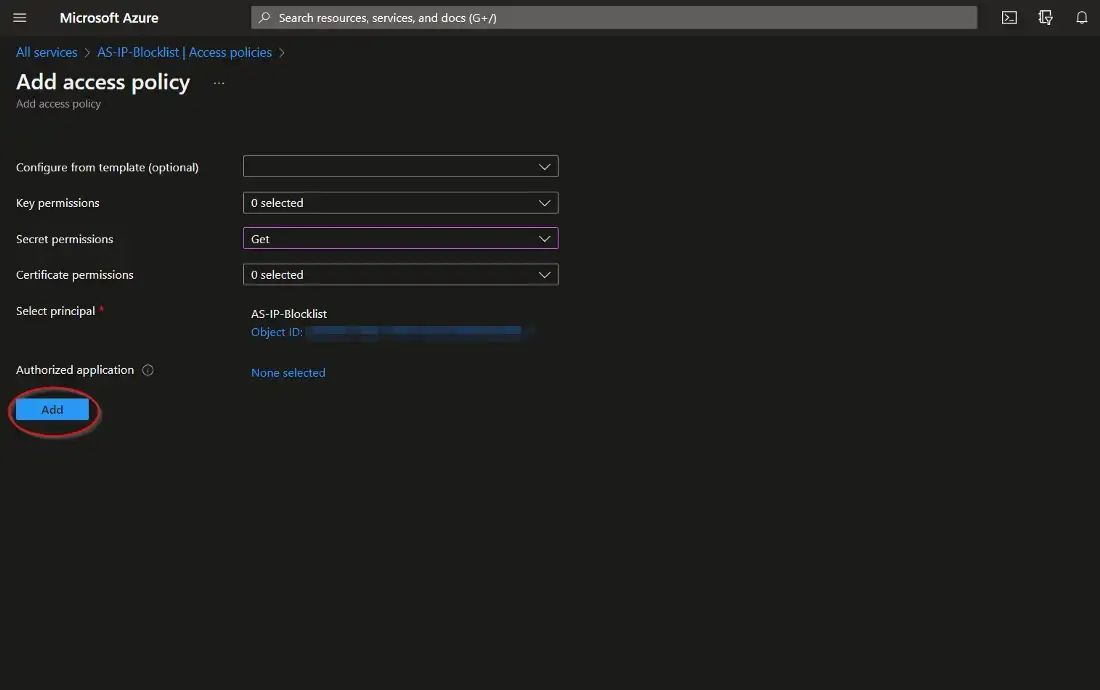
Select the “Get” checkbox in the “Secret permissions” list field. Then click the blue “None selected” text next to the “Select principal” field.
Paste “AS-IP-Blocklist” into the principal search box and click the option that appears. Click “Select” towards the bottom of the page.
Click “Add”.
How to Troubleshoot Azure Active Directory Locations?
You can use the Azure Active Directory Location playbook to troubleshoot issues you’re encountering with the feature.
The playbook will help you push your entities into a defined location of your choosing.
You can utilize this playbook in conjunction with Conditional Access to dynamically add IP addresses to a blocklist, reducing the time to respond to security incidents.
Benefits include a reduction in incident response time. An Increase in the cost of the adversary’s attack by forcing them to rotate IP addresses. Reduces potential for human error by following a playbook.
Conclusion
You can use Azure Active Directory locations to your advantage to reduce the amount of time spent on security incidents.
By following a playbook that automatically pushes entities into a defined location, you can utilize Conditional Access to dynamically add IPs to a blocklist, which will then reduce the time it takes to respond to security incidents.
Not only will this increase the cost of the adversary’s attack, but it will also reduce the potential for human error.